Getting started. Setting up chrome webdriver environment. This is a just basic tutorial on how to set up the environment. Will not touch a specific selenium testing. Maybe I’ll create a separate tutorial for that.
- Download chrome webdriver if you have not done it already. https://sites.google.com/a/chromium.org/chromedriver/downloads
- Place the chromdriver.exe that you just downloaded anywhere in your computer. Eg in C:\ drive.
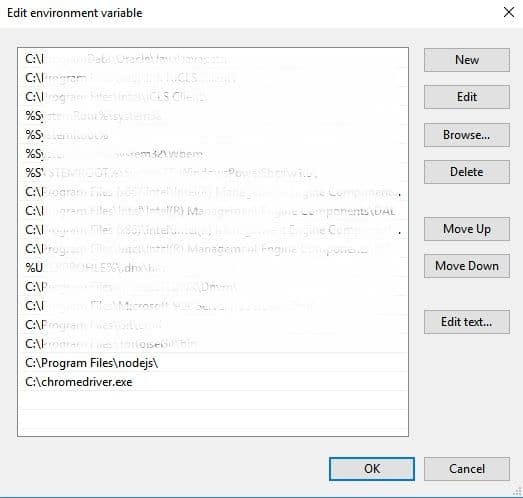
- Open up edit system environments.
- Add full path to the chromedriver.exe. Eg, C:\chromedriver.exe
- Make sure selenium is installed by running pip install selenium –upgrade (put upgrade flag just in case you already installed and needed an upgrade)
- And run this code
from selenium import webdriver
browser = webdriver.Chrome()
browser.get(‘https://www.google.com.my’)
- Chrome should be able to launch successfully. The chrome will have a yellow ribbon labeled “Chrome is being controlled by automated test software”. If you see that and the url we entered can be loaded successfully you are good to go to proceed with Selenium testing using chrome web driver.