DIY upgrade on a personal laptop.
Lenovo X240 is a great laptop. Minus the bad display and the badly design touchpad. X230 and X250 touchpad is much better. The button was on a separate panel. Other than that, all is good for this 12 inch small companion of mine.
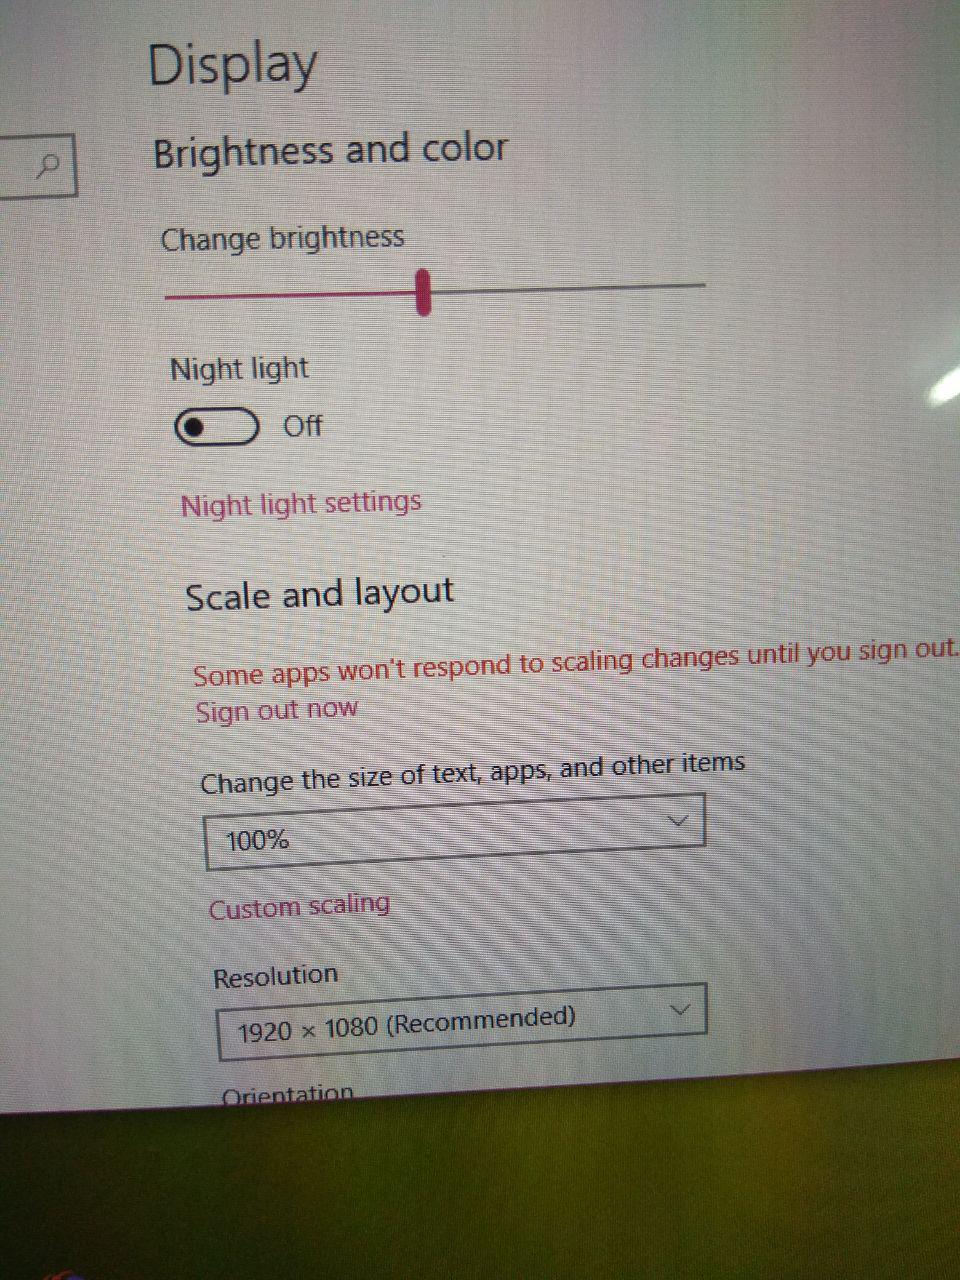
This is my secondary machine and this laptop always connected to my full hd external monitor. Because I can’t stand working on the horrendous display. Default display panel is a TN display with 1368×768 resolution, bad viewing angle and definitely a small resolution for a programmer. It may be cheap solution for the manufacturer but very bad experience for the consumer I must say.
If you were planning to buy a new laptop, please buy at least a full hd display. Great for your eyes and big screen estate. Much stuff you can fit on your display at a time. You won’t regret it. 1368×768 should be ban on a new laptop!
Lets get started!
First question you should ask yourself if you planning to upgrade your laptop display. Does my laptop support an upgrade? Not all laptop support plug and play solution like Lenovo X240. So you should spend some time research on google to find out more info on your model. I’ve done my research on my model obviously, luckily it won’t require much to tinker. Just swap the new panel with only one cable that I need to unplug.
Secondly, where to buy those new panel? I’ve listed the most probably best sites for you to find it.
- Taobao (this is where I got mine).
- Aliexpress.
- ebay.
- Amazon.
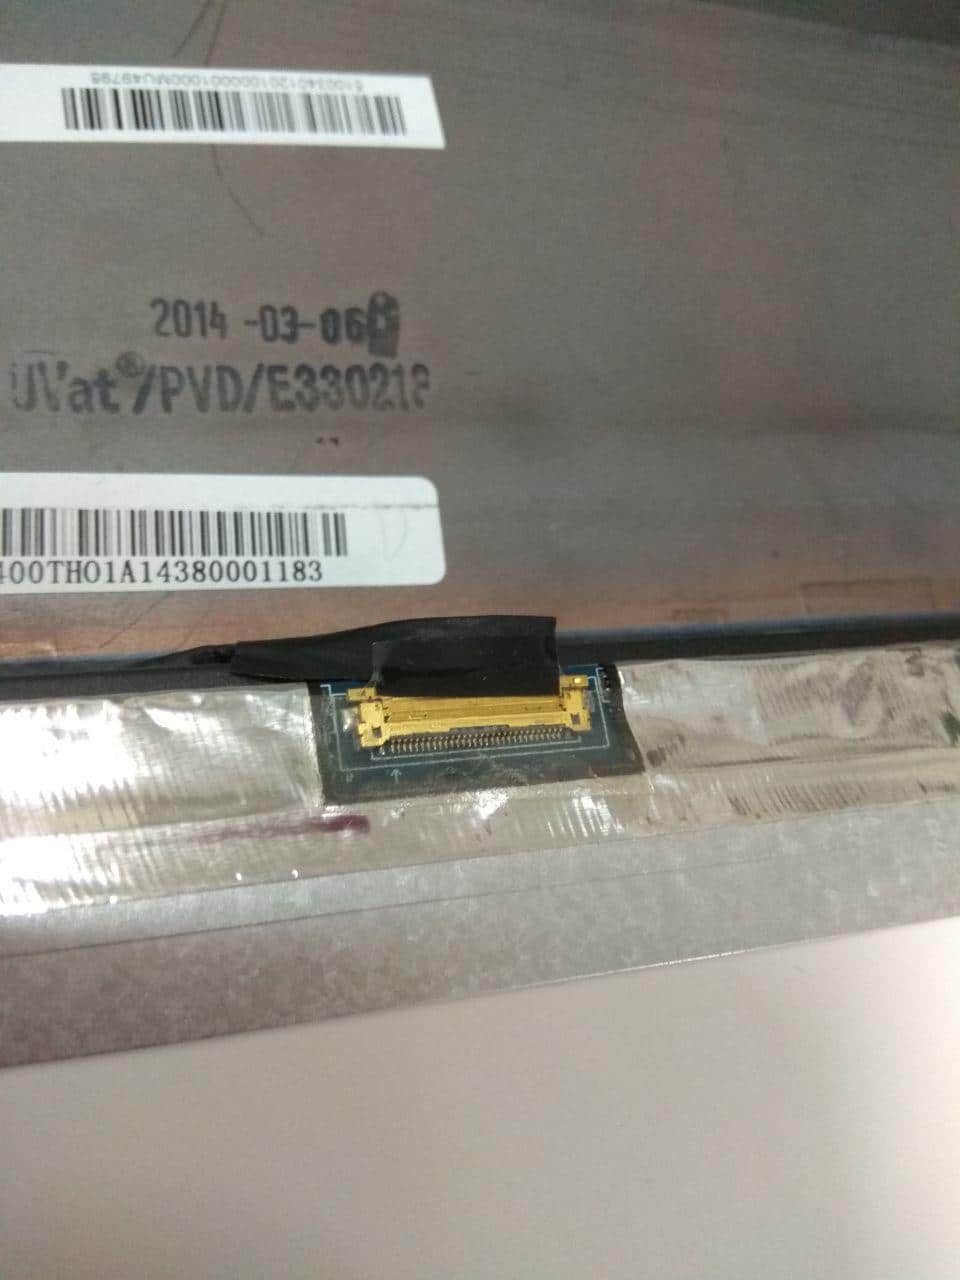
I found mine on Taobao to be the cheapest, plus the best warranty that the seller could provide. When you do the searching, you should know which exact panel model that you are looking for. For me, I knew it before hand I’m looking at this particular model, LP125WF2-SPB2. If you’re not sure what panel you need to buy, just give the laptop model to the seller and he will assist you to find the best solution for the display replacement.
The shipment from Taobao took around 10 days to reach me, not bad.

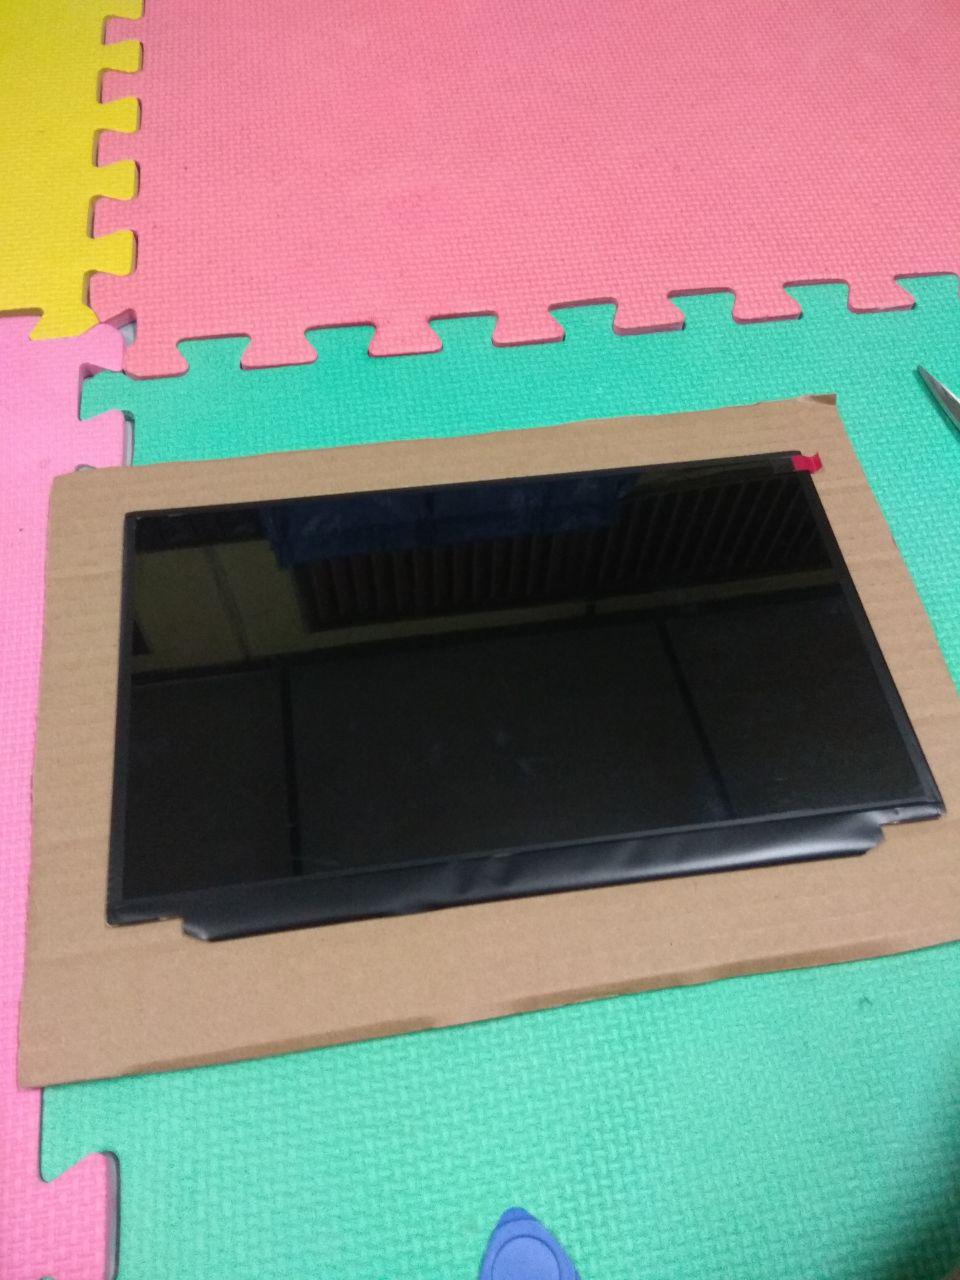
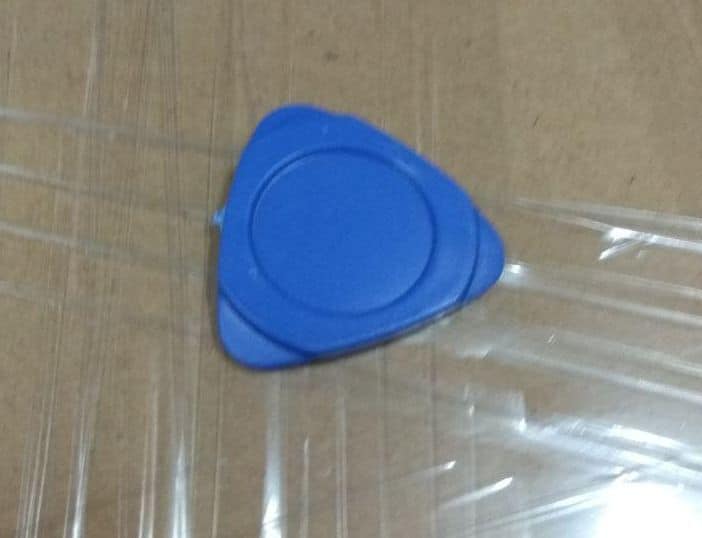
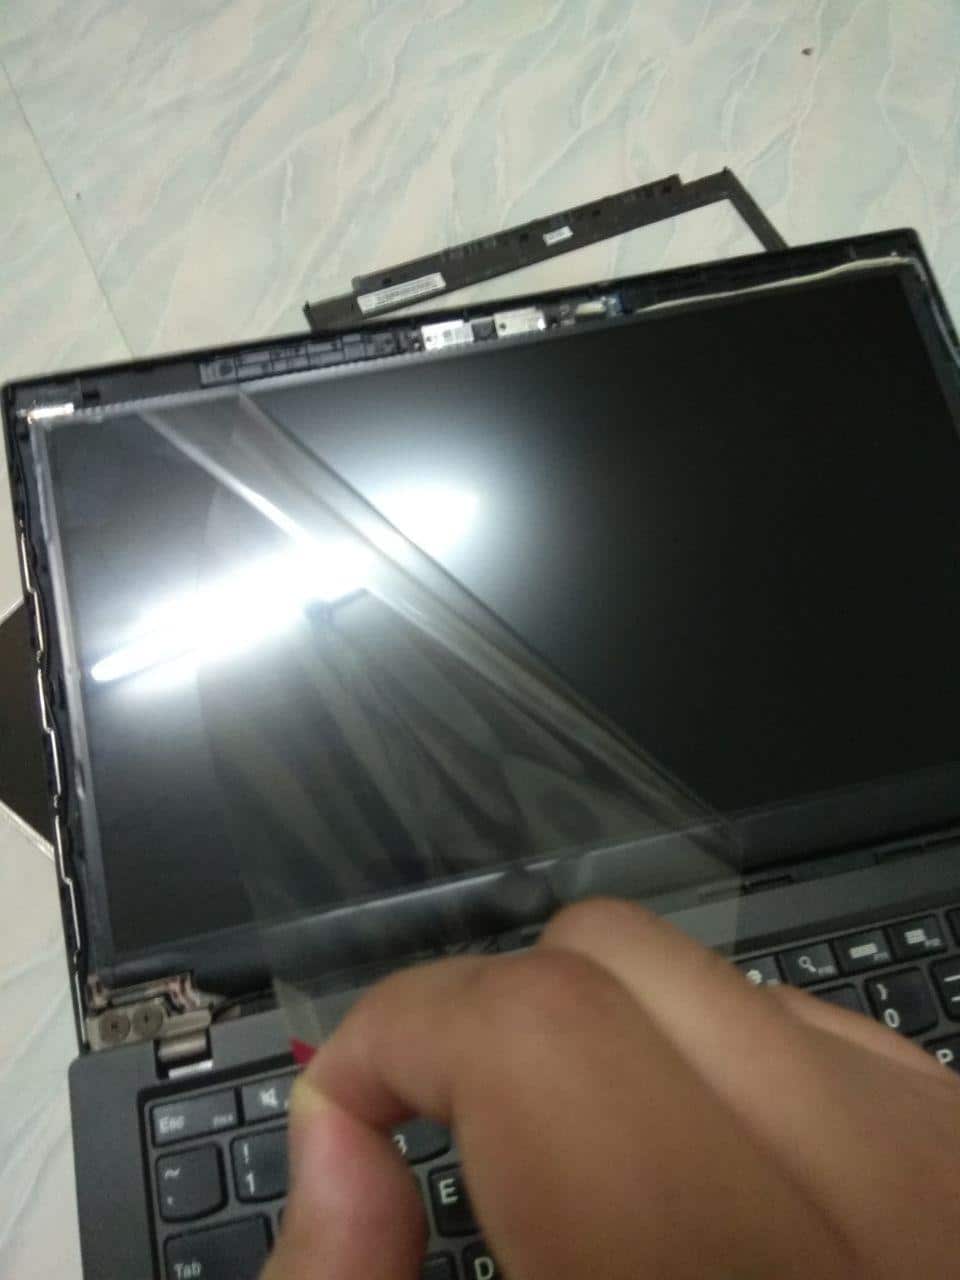
Third, assemble time! Prepare the whole tools that you might need to dissemble your laptop display. For Lenovo X240, it was easy. I just need a guitar pick to open it. No screwdriver required since the panel is not attached with any screw holes. The seller was kind enough to bundle it together. No worry on that part.
IMPORTANT! Before you start, make sure you have unplugged your battery and turn off the internal battery from the BIOS. Once you do that you’re good to go.
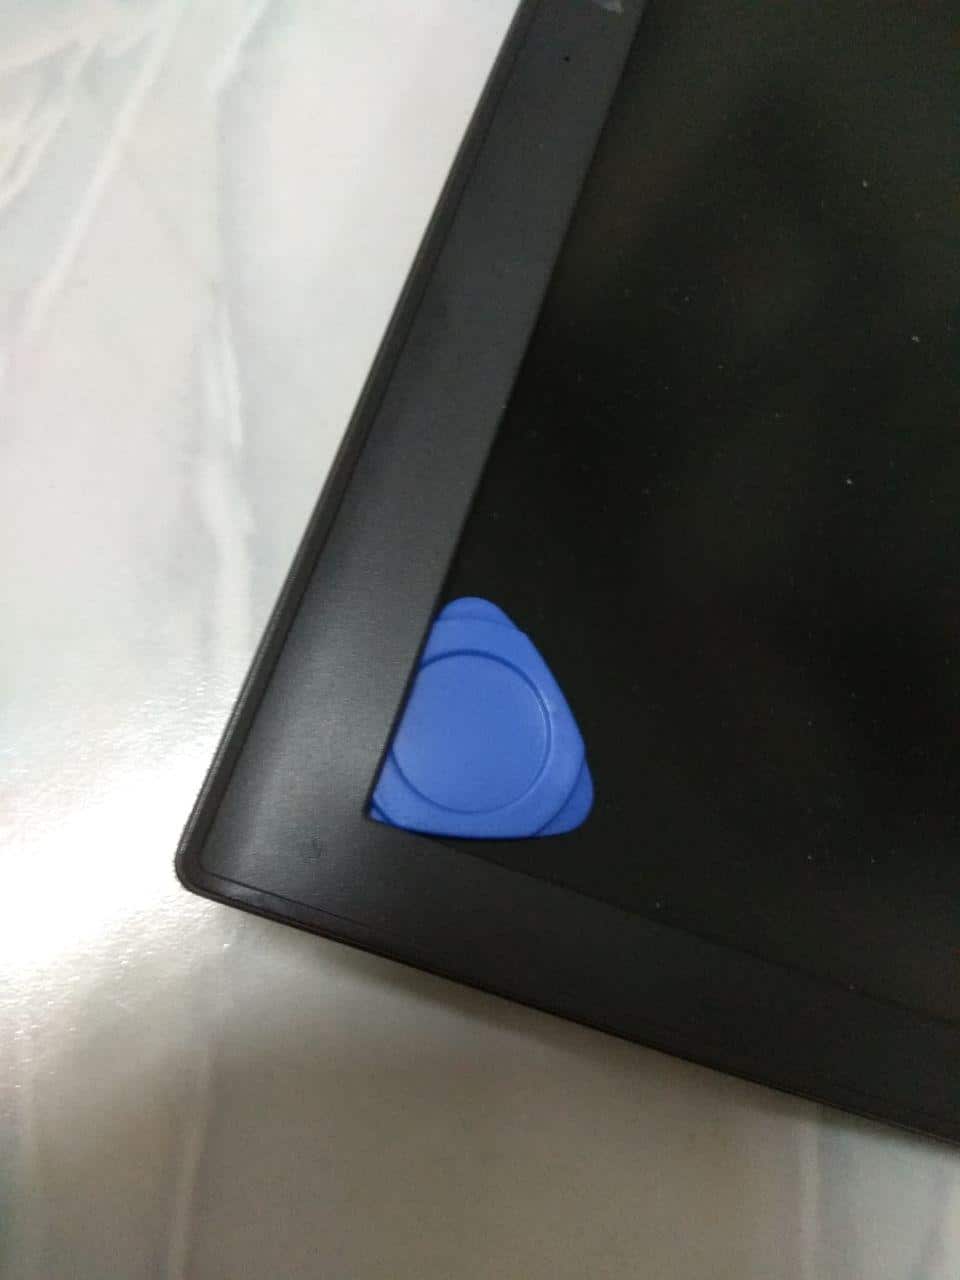
Just stick the guitar pick at the edge of any corner of the display. Slowly move around the edges until the panel pop out. Once it pop out you can continue using your hand to force it. But be very careful. Do it gently.
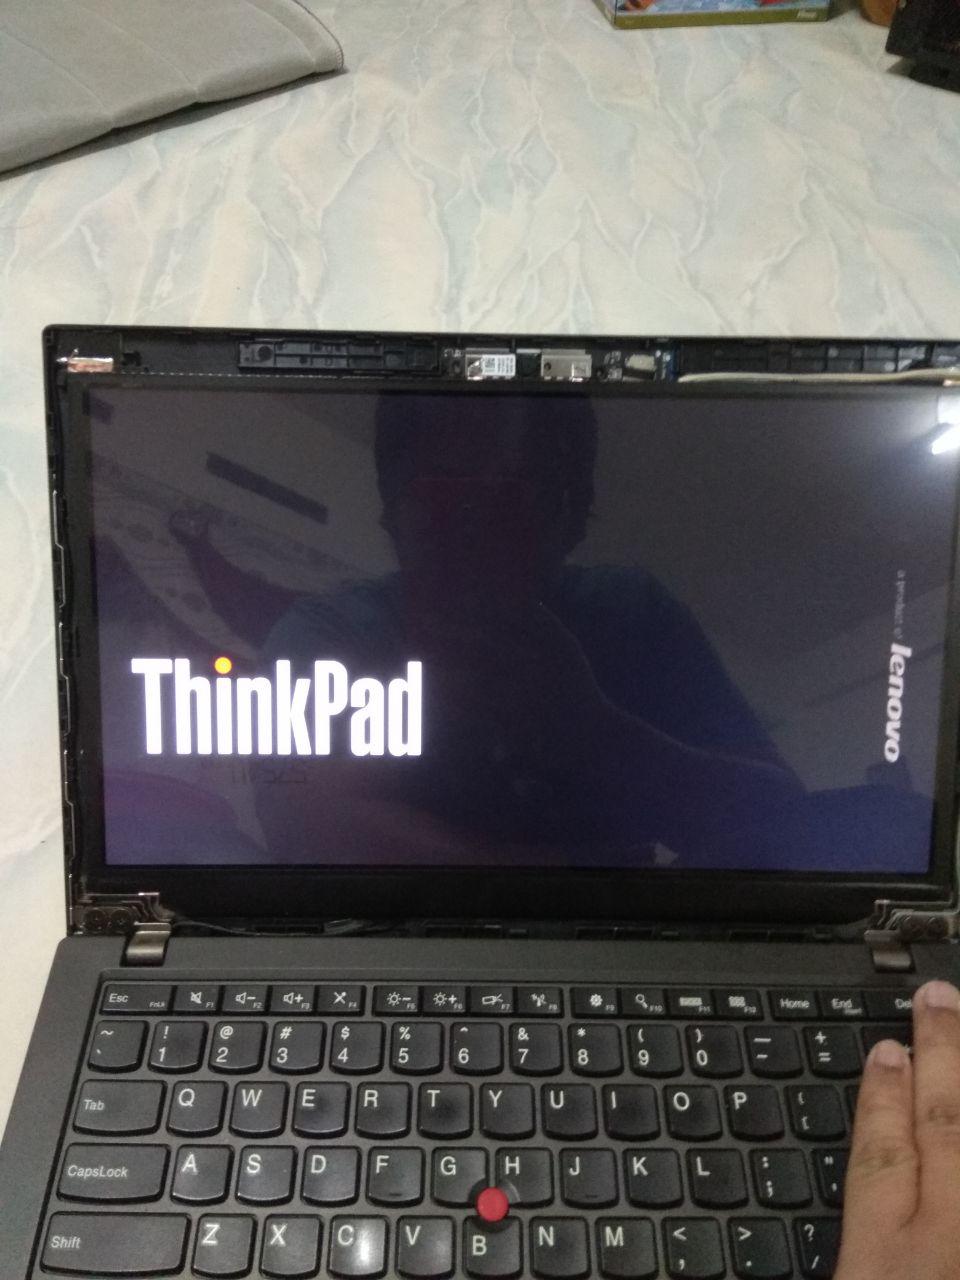
Once you managed to do it all. The display case will fully disengage.
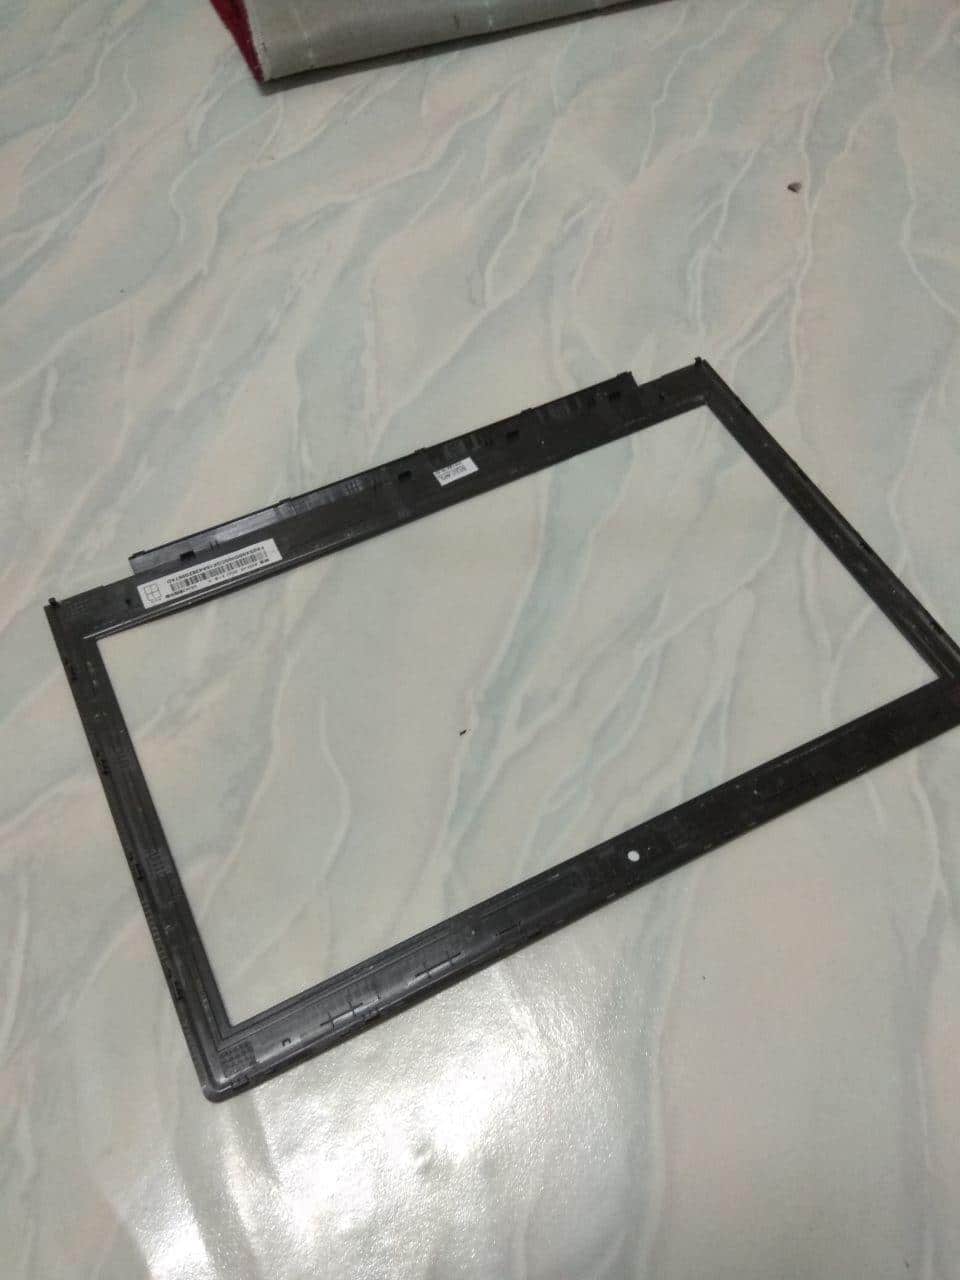

Flip the old display and you will find it connected to one small cable at the bottom. There is a sticker to hold the cable. Gently remove the sticker and unplug the cable.
Once done. Do not put the frame back. Just do a quick check just to make sure everything is working fine. Power up the machine!
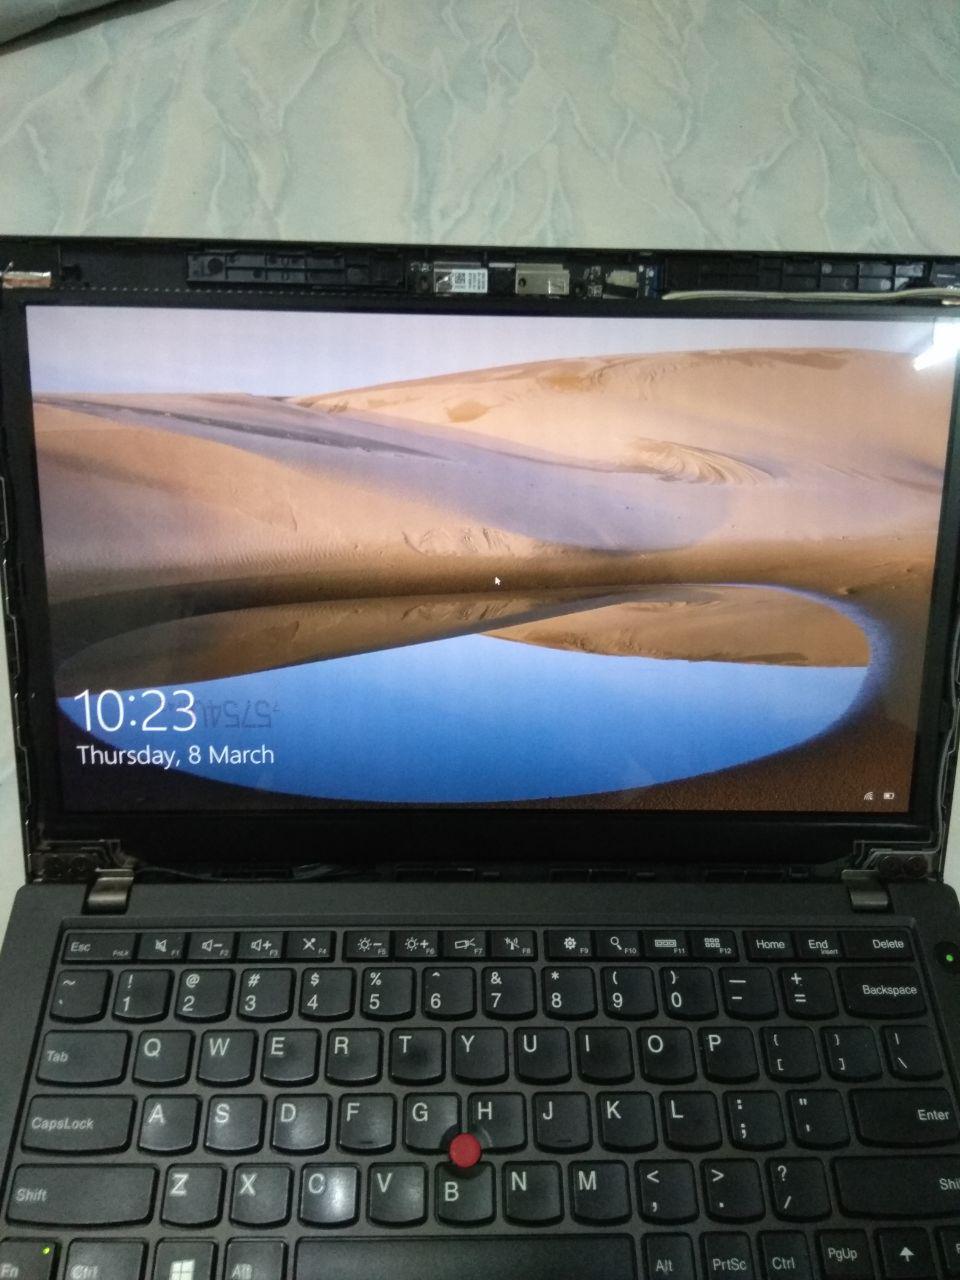
Everything is fine, time to turn off the laptop and put back the frame. Push the frame gently to it course until it clicks!
And finally remove the protection sticker.
Ahhh the feeling when peel this thing off. It was great experience. I’m enjoying my full HD display now. You guys should do the same too!
Hi Izzat. Just got myself a refurbished x240 recently and came across your website. May I ask how is the Full HD IPS screen? Does it drain more battery life and can the brightness and other settings be adjusted in the os itself? Any feedback is much appreciated. Thanks=)
Regards,
Wan
Hi Wan,
Sorry for the late reply. So far the IPS panel was superb. But I can’t comment on the battery life. As I didn’t depend much on the battery juice. My work style is always plug to the AC.
Yes the brightness can be adjusted in the OS. You can use thinkpad shortcut on the keyboard to adjust it. Full functionality.
So great
I upgraded successfully my X240 to FHD, But I cannot use some wifi card. I searched and they told me must flash mod bios.
Congrats on the screen upgrade! But why you want to change the Wifi card? Issit for hackintosh? Yes in order for you to use different wifi card you need to mod your bios. The process will whitelist your card in bios for it to fully functional.
Hi Izzat,
Do you know if is mandatory replace the FLAT cable to use the IPS Display in X240.
Actually I’ve a TN display and i want to replace it like you.
regards,
Hi Luiz,
You don’t need to replace the cable. Just buy the new ips panel and you can reuse the old flat cable from the TN panel.
can share the taobao link?
Here you go,
https://item.taobao.com/item.htm?id=528684143773&ns=1&abbucket=13#detail
Hello bro. Have you ever tried to upgrade your touchpad to x250 synaptics touchpad? If so, can you share how you do it. This current touchpad is killing mee
Not yet bro. Planning to upgrade it. But at the moment I mostly used my mouse. Only use the touchpad when I’m on the go. I’ll update my post if I did upgrade the trackpad to X250.
Hi,
i did it on my x240, but there is one moment you need to keep in mind – drivers. you need
to use drivers for x250, otherwise it will work as old touchpad, no keys.
another thing and actually very annoying is middle button settings – if you want to
use it for scroll lock – you need to change settings after reboot(sometimes after hibernate),
to make change permanent – you can use local GPO or push .reg file after boot.
all above is for win7, mine not yet upgraded to w10.
I read an article saying that if you fit a 1080p ips pannel on an x240 that you will still only get the old lower resolution does anyone know if that is the case
thanks in advance
What article is that? I can confirmed that it is bogus. I’ve tried myself. You should know that by default X240 comes in multiple variant. Some with lower and higher resolution display. The board is supported up to 1080p screen. So 1080p IPS on X240 is not a problem.
And with the actual evidence I’ve shown in this blog post if you still not convinced I don’t know what will. Cheers.
Just came across your post, love my X240, like you, I don’t worry about the trackpad prefer to use my mouse.
This is the screen I bought https ://www.ebay.co.uk/itm/202662717700 , hope it will be ok, should get it within the next two days,will come back & let you know.
Hello, if you still have your old x240 screen around, could you measure its length? I was planning on upgrading my hd ips screen to fhd, but when I check ebay some screens there are 282 mm long, while mine is 290.
Thanks for the beautiful and detailed guide!
Hello,
You can check out the item here, I believed there is a technical specs somewhere on that page.
https://item.taobao.com/item.htm?id=528684143773&ns=1&abbucket=13#detail
Please confirm the connector and the model from the seller.
Hi Izzat,
Great transformation. I plan to change mine too, but I cant access the taobao link as it is written in Chinese (:(.. any tips on english version link or app?
Hi Salz,
I don’t understand Chinese either. Maybe you can google translate to translate the site automatically? Or the easiest way is finding a local provider that will buy the item for your. This is what I did. They will charge a small fee for handling your item. Reasonable charge that keep me away from all the hassle.
Hello, i have upgraded my x240 as your guide says. Everything is perfect but somehow i cannot change the brightness anymore. Maybe the display driver. Did you encounter same brightness problem as me?
I am using Windows 10.
Hi Hanifah,
There are a few questions that I can ask to get started. Before you change the LCD, is the brightness is working on the old panel?
The second one, after you change to the new LCD, did you reformat your Windows 10?
A long time ago I was looking for such a guide, thank you very much for this. But I have a query, I read in several forums that Lenovo has a “white list” of compatible panels, with which you can change the brightness, and in those that do not appear in the list, changing the brightness does not work, you used this type of information ? or did you buy any compatible
Hi Octavio,
Yes, there is certain model compatibility that allows the fn keys to work to adjust the brightness. To be safe buy the exact model like mine. It is proven to work and I’m able to adjust the brightness. Everything else works perfectly.